Search This Blog

Showing posts with label Frame. Show all posts

January 20, 2014

Anything But A Card at Catch the Bug


Hi, everyone!
If you came for the Bugaboo Birthday Hop, please click HERE!
I do hope you'll visit my other posts for this week, as well. :)

It's an ABC (Anything But a Card) Day over at Catch the Bug, and it's my turn to create something! :0) I always have a difficult time coming up with projects for ABC Day. I had to come upwith a gift for my besties new grandbaby, so I combined todays theme with that goal in mind to come up with this Memory Frame (the frame is a 12x12 that I picked up with a 50% off coupon at AC Moore). The bear in the corner is a Bugaboo Stamps image called Jesse Bear - Topper. I converted the image to an SVG cutting file (with special permission) using my eCal software.

Click Image to Enlarge It


Here's a closer look at the adorable paper piecing:

Click Image to Enlarge for Detail

PLEASE NOTE: 
It is noted in the Bugaboo Stamps Terms of Use that creating die-cuts without express permission is not allowed. ALL MY PAPER PIECED DIE-CUTS WERE CREATED WITH PERMISSION! 

I hope you like what you see! 
If so, please consider following me! ========>>


Pick up this cute Bugaboo image, and others, over at the Bugaboo Stamps Store, and make sure you also jump over to the Catch the Bug Challenge Blog: it's where you can find out all the lastest "dish" on what challenges are happening and what other challenge sites that Bugaboo is sponsoring (more chances to win some free Bugaboo!). It's also where you can check out all the other fantastic DT projects, including the OBG (Oldie But Goodie) stuff, the ABC (Anything But a Card) items, and the Tuesday New Releases......plus so much more!

September 16, 2013

Hoard No More, Just Stick It!

Hi, everyone! Happy Monday!
This post will be a quick one: I am over-tired from staying up much too late last night, working on this project, and now even my poor fingers are tired! lol!
If you've been crafty for any time at all, you may be like me and have a ton of things you fell in love with, bought, and then never used because you're waiting for that "special" project, or the "right time" to work with your hoarded stash......or maybe you just lost it in a crafty, chaotic spot in your space....somewhere!? :)
Well, I had this genius idea to be more efficient with some of my papers in my craft room. Not the designer papers or card stock, but things like my design team calendar and coupons I may want for the week. They usually end up scattered on my craft table, and in the way, so I wanted to give a try at a fabric covered cork board. I had scoured web sites looking for the best, easiest, cheapest way to make one. I purchased some super-affordable 12" cork board squares, some spray adhesive, fabulous Debbie Mumm fabric Fat Quarters (LOVE ebay for these!), and even a small stapler and staples to use for wrapping the fabric around the cork. You know what?! It all was stashed away in my crafty cupboards for over two years!!!
Well........NOT ANYMORE! :)

CLICK PHOTO TO ENLARGE

I cut my 12" cork squares into 4" square pieces.  I cut my fabrics into 5" squares.
I ran the fabric through my Xyron machine, placed a 4" cork square on it, then wrapped it as tightly as I could. I was not very diligent about my cork sizes when I made them, and I ended up having to carefully peel off a couple of the fabric pieces from some squares when placing them together in my quilt pattern, and then trimming them down and rewrapping them to make everything fit well. There are still some that are bit off for my liking, but I've learned my lesson about being diligent with cutting the cork! lol! I will definitely do better on the next one (ohhh, yes! There WILL be more of these hanging around my house, and I'm even thinking of making a few for gifts!)
The frame I used is one of the "Float" frames I had picked up from local craft store (Have had that "forever", too!). It was not originally intended for this project, but it worked well, giving me a nice size for a cork board (it measures 16" x 20"), and a great way to hang the small squares with just one hanger. 
I removed the glass from the frame (this frame comes with two 1/4" glass pieces). I used one piece of the glass as my back for the cork squares, and applied the squares using 1/2" double-sided sticky tape.

Okay - that's it from me today. I think I need to go searching for my hoarded buttons to make some cute "custom" push pins with them! :)
This will be so great for hanging some of the papers I have to hang, and I may even decorate more with some fun die cut characters (*wink*wink* Stay tuned! lol!)
Have a great day, everyone! Thanks for stopping by!

Challenges entered:


June 10, 2013

Anything But a Card at Catch the Bug


Hi, everyone!
It's an ABC (Anything But a Card) Day over at Catch the Bug, and it's my turn to create something! :0) I always have a difficult time coming up with projects for ABC Day, but I to come up with a graduation gift for my son's very sweet, very unique girlfriend. She has such a wonderful, light, bright personality, and this Bugaboo Stamps Cat in Hat image was a perfect image that worked for a frame I made her (photos here are pre-framing).

Click Image to Enlarge It

This is a single page 12x12 layout using the Bugaboo Stamps image Cat in Hat - Youer than You.   It is going to be mounted into a shadow box frame. I love, love, love the Dr. Seuss stuff! I colored up the Bugaboo image in my PSE, then took it into my Silhouette Designer Studio program to Print and Cut it out for my layout. I picked up the pink Seuss paper at Joann a while back, and knew this would be perfect for the frame, too. I made my ornate frame from a Silhouette cut file on my new Silhouette Portrait (I am loving the compact size of this machine! Awesome!). My title letters are all Sizzix Playground Alphabet Sizzlit die cuts. I used some EK Success borderpunches, some Spellbinder Circle dies and some heart rhinestones. I am going to add her name to the page, too, but wanted to keep that off the internet for her privacy. :)

Here's a closer look at the Bugaboo image.

Click Image to Enlarge for Detail

So, that's it for me today! I hope you like what you see! 
If so, please consider following me! ========>>


Pick up this cute Bugaboo image, and others, over at the Bugaboo Stamps Store, and make sure you also jump over to the Catch the Bug Challenge Blog: it's where you can find out all the lastest "dish" on what challenges are happening and what other challenge sites that Bugaboo is sponsoring (more chances to win some free Bugaboo!). It's also where you can check out all the other fantastic DT projects, including the OBG (Oldie But Goodie) stuff, the ABC (Anything But a Card) items, and the Tuesday New Releases......plus so much more!

August 26, 2011

Free SVG Friday - Fancy Scallop Oval Frame

Hi, everyone!
I managed to create this fancy frame this week. I'm still sifting through paper piles, trying to organize....yep, I said STILL! lol! I'm a little distracted with mountains of laundry from my son coming home from school, and working on settling him in. It's taking a bit longer than we planned because he's already working full time, which is a good thing! Yay!
Anyhow, here's what I came up with for you this week
Fancy Scallop Oval Frame SVG
These SVG files are no longer available for free.
Please visit my SVG's for Sale Page located at the top of this blog.


This frame measures approximately 4"tall and 3-1/2" wide as sized in the file. Of course, you can re-size it to your liking, or remove the middle oval to create a mat. :0) I haven't had time to cut this one, yet, so if there are any issues with it when you try, please do let me know so I can correct them! Thanks for stopping by! 

May 18, 2011

Bees & Blossoms SVG

Hi, everyone!
Chris and I were married on May 3, and this year our wedding anniversary was extrememly low-key (i.e. we didn't do a darned thing! hahaha!) I did make him a card, though:
(Click Image to enlarge)
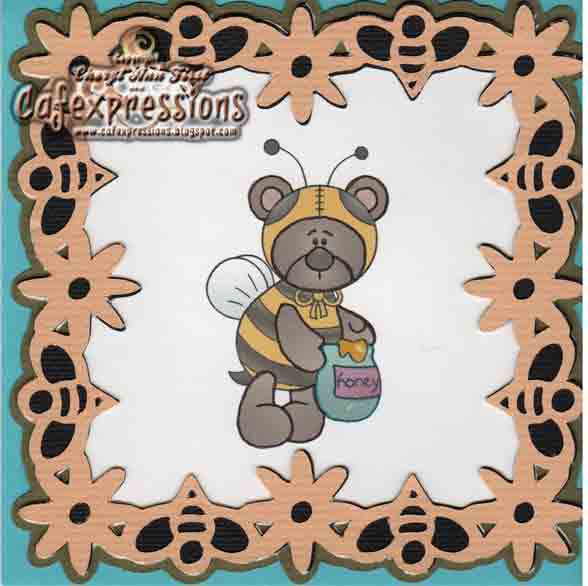
This card uses my Bees & Blossoms SVG

The border frame is my creation, and the free svg for you today! I sure hope you like it - it took me a really long time to make this one! :0) The digi image is from The Paper Shelter. I was a lbit disappointed in the print quality of my colors, which was done in PSE. I think the paper I had in the printer was not the one I usually use for my card images - it's just not as bold and crisp as usual. My hubby liked it, anyhow! :0) 
The frame svg contains the top layer, a middle layer and the shadow base layer. The white layer I cut by removing the inside cut of the middle layer in SCAL. This card shows as a four-layer, but the file is actually for three. I hope you enjoy! 
Please leave some love, and let me know what you think! It is a more intricate design, so it did take a bit of cutting time. I cut four layers on one mat, and I think it took between five and seven minutes, total.

This file is no longer available as a freebie!
If you wish to purchase the file, cost is $1.50. I accept Paypal payments only for my files. Payment can be sent to my yahoo email address. Please make sure to include the email address you want me to send the file to in your payment, as well as a note indicating which of my files you are purchasing.
Thank you!
email: cherylfirst1@yahoo.com

March 27, 2011

Pirate Anchor SVG Freebie

Hi, everyone!
I hope you are all having a wonderful weekend, so far! I woke up this morning to snow on the ground!! I know.....it's crazy! :0(
I have been busy this weekend.....on Friday I drove to Cleveland with my hubby to pick up my son for his Easter Break. It's a four hour drive, one way, so it was a very long day in the car! I'm glad to see him, and our visit, so far, has been pleasant; of course, it's been all about him the past couple days, so I would expect nothing less! hahaha! We had to take him for a college campus tour on Saturday morning, and that lasted most of the day. It was a decent day, though: the sun was shining, the tour was informative, and Kyle has made his final decision to attend that school, so I am happy that the tours are over! hahaha!
Hubby and child are fast asleep this morning, still, and it's almost 9 am! Sheesh! I have a feeling that my "boys" stayed up into the wee hours playing video games last night! hahaha! I had a little time to myself, so I put this card together:
 Created using my Anchor Frame/Mat SVG
It started out as an entry for the Catch the Bug Blog Challenge for Bugaboo Stamps, but since it's an epic failure at monochromatic, I'm not so sure I should post it: maybe had I chose a brown for the anchor.....maybe. I used a Bugaboo Stamps image from the "A Kids View" Collection, which you can find on the Bugaboo Stamps website. I didn't think this collection was up my alley, but now that I colored in the pirate image, I really like it! I'm thinking I may have to pick up a few more! 
Anyhow, the Anchor Frame is your freebie SVG today! The download link is located in the sidebar of my blog to the left, titled "Anchor", or you can pick it up HERE. The file contains the Anchor Frame, and also an Anchor Mat. Please adhere to my "Terms of Use" when using my files (there is a copy in the download folder for you)!
I'll be back soon with another card, taht better meets the Monochromatic Challenge! hahaha! I have to redeem myself!
In the meantime, be sure to check out my Blog Candy, and enter for your chance to win!

Thanks for stopping by! Happy Crafting!

This file is no longer available as a freebie!
If you wish to purchase the file, cost is $1.50. I accept Paypal payments only for my files. Payment can be sent to my yahoo email address. Please make sure to include the email address you want me to send the file to in your payment, as well as a note indicating which of my files you are purchasing.
Thank you!
email: cherylfirst1@yahoo.com

March 7, 2011

Bugaboo Luck & Kaboodle Doodles Challenge

Hi, everyone!
I worked on this card last week for the Catch the Bug Challenge Blog "Green With Envy" challenge,  but I had missed the posting deadline for that one. Instead, she is going to be entered in their "Anything Goes" Challenge, and also in the Kaboodle Doodles Challenge Blog "Go Green" challenge! I think she's cute, and thought you might like a free svg today, so here she is! :0)
I used Jodie's, cute little fairy, and colored her in PSE. You can find her on Jodie's website, Bugaboo Stamps. The papers I used are Stampin' Up card stock: Glorious Green. The dp papers are some old MME papers I've had in my stash. The shamrock and the layered frame are my creation, and available as a freebie in the left sidebar under "Shamrock Bubble Frame" and "Clover" (two separate files today! (0: )
I used PSE to make the sentiment, punched it and layered it with Stampin Up hand punches, 1" Circle, 1-3/8" Circle. The two tiny clovers are negatives of the frame, and I colored them in with some gel pens. The large clover is run through Cuttlebug with the D'Vine Swirls folder, then I added some Lime Green Stickles to the embossed swirls. Two gem brads for the Stampin' Up Designer Brads on the bottom corners finished it off.
As you can see, I did take a few liberties with the sketch part of Bugaboo's challenge, but I think you can still see the sketch here.......can you??
Happy Crafting, everyone!