Search This Blog

Showing posts with label Tutorial. Show all posts

May 2, 2014

Freebie Friday at Bugaboo Stamps, and Dots from Pony Beads!


It's Friday.......time for a Bugaboo Stamps Freebie! 
It can be picked up in the store for FREE, but only for a limited time! Be sure to check out the other fun images that Jodie has to offer at Bugaboo Stamps! There's a little something for everyone, and they're all sure to put a smile on someone's face! :)

Click Image to Enlarge
This is Mama Bird. While she would be perfect for a Mother's Day card, I thought I'd use her for something a little more universal; after all, I only have one mom, and I already have that card done! :)


I colored up these cuties in PSE, then created the Reverse Spotlight Technique for my sentiment using my Stampin' Up punches: Scalloped Circle, 1-3/8" Circle, 1" Circle. That little dot in my lower right corner is one that I made from Pony Beads! I was so excited to have found this tutorial, as directed to me by my pal and teamie, Lola. My little branch cut is from a Silhouette file, and it has some tiny blue spots brushed on with my SU markers. The tiny flower near the sentiment is a Marvy punch.

Pick this up as a freebie for a limited time only, over at the Bugaboo Stamps Store, and make sure you also jump over to the Catch the Bug Challenge Blog: it's where you can find out all the lastest "dish" on what challenges are happening and what other challenge sites that Bugaboo is sponsoring (more chances to win some free Bugaboo!). It's also where you can check out all the other fantastic DT projects, including the OBG (Oldie But Goodie) stuff, the ABC (Anything But a Card) items, and the Tuesday New Releases......plus so much more!

Step-By-Step Dots Recipe
**********************************
Here's a pic of my Pony Bead stash, and a quick step-by-step to make the dots.
Items needed:
Pony Beads - I used Mini Pony Beads from Hobby Lobby. They measure 7 x 4mm
Baking Sheet
Parchment Paper
Paper Piercing Tool (optional)

1. Preheat Oven to 425*
2. Lay a piece of Parchment Paper on a cookie sheet
3. Arrange Pony Beads on the Parchment, I left approx. 1"  between each, so they wouldn't melt together. *Tip: Use your paper piercing tool to help place the beads around your parchment. The needle of mine fit nicely in the little hole of the bead.
4. Bake approx. 10 minutes. Mine took 8 minutes, but ovens may vary, so keep a close eye on them.

I kept my fan running while they baked, and a few minutes after, to avoid a strong plastic smell in the house. It was minimal, at best! Once the dots were melted, I picked up the edge of the parchment and they fell right onto the counter. I love parchment! :) A little bit of glossy accents, or other clear adhesive, and you're ready to use these! They didn't even take but a minute to cool! 

Melted dot size is approx. 1/4" diameter.
**********************************


Thank you so much for stopping by my blog today! I hope you'll kindly leave a comment, or become a follower. If I know you were here, I can come to visit you, as well.

November 28, 2012

Tutorial Wednesday at Catch the Bug

Hi, everyone!
Today I am going to show you some simple steps that I take, as I learned from Kittie Kraft, for shipping my dimensional cards through the mail. This helps protect those pretty layered and dimensional elemts we all like to add to our cards!

Here's the card I am working with in this tutorial (you may remember it from a post I made a few weeks ago.) This image is a Bugaboo Stamps image called Candy Cane Critter - Mouse. My flower on this card stands off the face of the card approximately 3/8", so I am using a 1/2" thick strip for my packing. If I had brads, dew drops or similar, a 1/4" strip would have sufficed.

Materials you need:
Padded Envelope (I like to recycle mine :0) )
1/4" or 1/2" strip of card stock
Flat piece of card stock approximately the  size of your card
Adhesive (dbl-sided tape, glue, staple, etc)


Step 1
Glue your strip of card stock to create a circle.
Tip: You can pinch off four corners to create a square or rectangle if you wish.

Step 2
Place your circle around your embellishment.
Note: If you have several dimensional embellishments on your card in several areas, create a larger circle to encompass all of them within.

Step 3
Place your flat piece of card stock on top of your circle.
You shouldn't need to tape this down because the padded envelope will hold it in place, but to spiff it up some, try wrapping it in a pretty piece of tissue paper before putting it in the envelope.

Step 4
Place your "sandwich" in the padded envelope, seal, and ship!
I always mark both sides of my enveloped "Hand Cancel Only, Please!"
to help avoid any machine squishing at the post office.

That's it, folks! Pretty simple, huh?! 
Thanks for stopping by!
If you enjoyed your visit, please consider following me ======>>


April 25, 2012

Tutorial Wednesday at Catch the Bug - Creating shaped cards using Nestabilities Dies


Hi, everyone!
It's a Bugaboo Tutorial Day over at Catch the Bug Challenge Blog, and I am the lucky design team member that has the privilege of putting together a technique tutorial for you today! :0)
First, here is the card I created using this Shaped Card Technique, using the great Bobblehead Farm Duck image that Jodie has in store for you:
Click Image to Enlarge

I like to make a scalloped square, circle or sometimes a label shaped card using my Nestabilities dies, and this is a quick step-by-step on how I do it. I know there are plenty of videos and other tutorials on this, but here's my version. :0)

CLICKING ON ANY IMAGE WILL ENLARGE IT FOR BETTER DETAIL VIEW
                                                      
Materials Needed:
Shaped Die  - I use Nestabilities by Spellbinders. For this tutorial, I am using the largest of the Classic Scalloped Squares. Remember that the larger the die, the larger the finished card base. :0)
Roller Machine - Mine is a Sizzix BigShot, but any will do!
Piece of card stock - I have used 4-1/4" x 8-1/2" here, but size will be determined by your finished shape size. Don't forget to double it to account for folding it in half.
Scor-Pal - Not required, but comes in handy


Step One - Score your cardstock in half. I scored at 4-1/8" for mine, so the folded card is larger than my Nestie die.


Step Two - With the cutting edge of the die facing up, line up the folded edge of your card stock so the die cutting edge is above the line. This makes it so the die will not cut the portion you can see, leaving you with a straight folded edge.


Step Three - Carefully turn the die and card stock over and tape the die to the card stock. 
I usually use small pieces of Scotch Tape, and adhere and remove it to my fingers a few times to lessen the "sticky" before applying it to the papers I use. This helps keep it from tearing the paper when you have to remove it.


Step Four - Run your cutting sandwich through the machine as you normally would to cut the die type you use for this project.
Note: I'm not giving a step-by-step on the sandwich because each cutting machine is a little different. Because the card stock is folded over, it is a little bit harder crank than normal, but it does go through. It even embosses the front side without having to run it through a second time with embossing mats (see pic below).


Step Five - Remove the cut shape from the tape and die, carefully to avoid tearing the paper.  


This photo shows the embossing that has been done as it was cut.


Done! :0)
Now it's ready for you to embellish!
The finished size using this die is 3-3/4" tall x 4" wide.


That's it from me today! I hope you enjoyed my quick little tutorial! Thanks for stopping by.........please stay a while longer, and browse! :0) If you like what I do, why not consider following me? ========== > >
Happy Crafting!

This card has been entered into the following challenges:


December 14, 2011

Faux Tile Tutorial

Hi, everyone!
It's a Bugaboo Tutorial Day over at Catch the Bug Challenge Blog, and I am the lucky Guest Designer that has the privilege of putting together a technique tutorial for you today! :0)
First, here is the card I created using this Faux Tile Technique, using the great Coffee Time - Thanks a Latte image that Jodie has in store for you:

I'm very excited, and just a tad bit nervous....this is my first tutorial! LOL! So, please leave me a comment when you're done reading letting me know what you think! :0)
I like to use large images on my cards, to show them off, but sometimes I like to mix things up a bit with them, to add interest to the card.  It is sometimes difficult for me to come up with new ideas for layouts when I use the bigger images, but this is one technique that definitely changes things up, I think! It's super easy to do, too!


CLICKING ON ANY IMAGE WILL ENLARGE IT FOR BETTER DETAIL VIEW
                                                      
Materials Needed:
Colored Image - 
for the purpose of this tutorial,  image is sized to 3-3/4" Square
Coordinating Solid Color Card Stock
for the bottom layer. I like to add half an inch, each side, to the dimension of the image size for this layer.
Paper Glaze, aka Glass Effects
Paint Brush
Cutter
Ruler


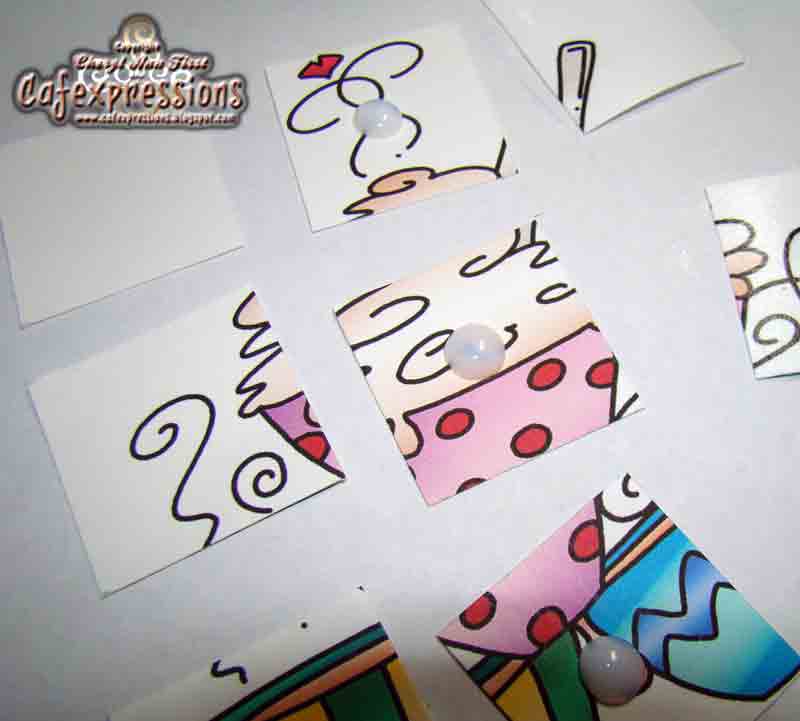
Begin by marking the image at equal intervals. For my 3-3/4" card,  the image is marked at 1-1/4" and 2-1/2" on each side. Once cut, each square will measure 1-1/4". 

Note: Compensating a bit on the cut dimensions may be needed, to avoid cutting in the middle of important parts of the image, like the face of a character, for example. It is okay for the cut tiles to not be exactly squared.


Once "tiles" have been cut, place them on a scrap sheet of paper to glaze them. 


Apply a small dollop of glaze in the center of each tile - I prefer to work 3 tiles at a time, just to avoid the glaze drying a bit and, more importantly, making sure I don't stick an elbow in it. lol! ;0)
Apply a thin coat of glaze to each tile with the paint brush, working the brush in one direction and making sure that the glaze is applied evenly -
the layer I applied to these tiles took approximately twenty minutes to dry. 

TIP: Rinse the brush with water after each layer of glaze is applied.


This image shows a closer look at the amount of glaze used. Adjust the amount according to personal preference,  keeping in mind that the thicker the layer, the longer the dry time and more likely to have air bubbles in it when it dries. 

TIP: Remove tiles from scrap paper immediately after each layer of glaze is applied to dry. This will keep them from sticking to the scrap paper. Remember to put the tiles back on scrap paper prior to applying each subsequent layer of glaze.


Once the first layer is dried, apply a second coat of the glaze, again working in one direction with the brush. 
Optional - Apply a third coat, once the second has dried, to create an even thicker glaze layer.

TIP: Alternate the brush direction to give more of a worn look. There will be brush strokes, regardless of one-direction or bi-direction movements when applying the glaze. 


After the final layer of glaze is applied, affix the dried,  newly glazed tiles to a coordinating piece of card stock using a favorite adhesive.  Make sure to leave a little bit of space in between each "tile": The bottom layer card stock acts as the tile "grout" - using a piece of card stock that measures 1/2" greater than each side of the image  allows for approximately 1/8" in between each tile and around the edges.

TIP: Distress the edges of the tiles and coordinating card stock for some additional wear. (done on the sample card shown).  Also, try inking the edges of each tile to give it additional depth and dimension. 

The "faux tile" is now ready for use on a project! :0)

Thanks so much for stopping by today! I hope you have enjoyed my tutorial, and give this technique a try! I'd be so glad if you would drop me a link to your creation so I can come by and check it out! :0)
Happy Crafting!


This card has been entered into the following challenges: