Search This Blog

Showing posts with label SVGCuts. Show all posts

September 17, 2012

A "Picture Perfect" Scrapbook Layout

Hi, everyone!
As many of you know, I have been toiling away at a scrapbook for my niece for a month, or so. I  had some eClips machine issues last week, just as I was about to cut my pieces for this page, but thankfully, Sizzix customer service totally rocks and had a new machine to me in less than a weeks time! :0)
I wanted to create a layout that can be used for those non-specific events....you know, the snap shots taken just because it's a "Kodak Moment"! :0)

Click to Enlarge Photos For Detail

Left Page Close-Up

Right Page Close-Up

Materials List
Close to My Heart Papers - You Rock!
SVGCuts Collection - Summer Blockbuster
SVG by Me - Small Movie Camera
Sizzlits - Sassy Serif Alphabet
Pop-Dots
Mini Brad
White Gel Pen
Stampin' Up Crushed Curry Ink Pad & Sponge Dauber

I have entered this layout into the following challenges:


March 8, 2012

Doodle Pantry Ants

Hi, everyone!

This is my second post today - please scroll down to see my OBG Bugaboo card - it's a cutie-patootie, too! :0)
A quick post today to show you the card I made for the monthly Doodle Pantry Challenge. :0) I love, LOVE the ants images that Doodle Pantry has, and these Popcorn Ants were just crying out to be used on a card, which holds some movie gift certificates for my son.

Click Image to Enlarge

I used SVGCuts.com Summer Blockbuster SVG Collection to cut the card shape, and for the tag. I practiced coloring the ant image with my Copics, and did some edge inking on the popcorn pieces for give them some dimension.

I hope you like it! Thanks for stopping by to check them out!
Happy Crafting!

This card has been entered into the following challenges:


October 6, 2011

Spook-takular! ...and a free sentiment

Hi, everyone! I am so excited it is October.....and Halloween is right around the corner! Yay! Halloween is my favorite holiday to craft for, and today I have a wonderful Stamping Dragon Designs image to showcase, called Spooks!
(Click the Image to Enlarge)
These three darling Spooks were part of last months Grab Bag, but now you can purchase them in-store HERE, along with the other great items that Stamping Dragon Designs has to offer! (All three Spooks cuties are in the file together). :0) 

I was inspired by my cyber-bff, Cely's, creation (click here to see for yourself just how inspirational it was! hehehe). I cut the film strip from SVGCuts.com Summer Blockbuster Collection (no, no....I didn't actually make my own this time! lol!). I did some shading on my "star" ghost using my Stampin' Up Markers (I don't have any grey Copics, yet. Boohoo!). My circles are cut using Spellbinders Nesties, and my Bat Chain and Drippy Goo edges are punches. I added some black brads from my stash, and adhered a new Halloween ribbon that I recently picked up at JoAnn (on sale, of course!). The sentiment is punched and layered using some SU punches. The sentiment, itself, is your freebie today. The file contains the sentiment as a jpg, both in color and as a black and white image. :0)


Thanks so much for stopping by! Don't forget to stop over at the store to see all the available Stampin' Dragon Designs images, and be sure to check out the rest of the highlights on my fellow DT's blogs for more great inspiration! (Their blog links are all located in the left sidebar of my blog for you! :0)) You should also jump over to the challenge blog for all the details on our current challenge, and don't forget to enter to win! :0)


I hope you will join me next week for more Stampin' Dragon Designs eye candy!

Please leave some love if you enjoy my freebies! I love to hear from you! :) This is how I know you were here, like what you see, and would like to see more! If you're not already, consider becoming a follower so you can be informed of new freebie posts! :0)
I am offering the file download for a limited time, only. 
The links will be active for approximately one week only, so get them while you can!
If you have any problems with this file, please let me know so I can fix it for you, and for others!

And, PLEASE....

Any files I offer are for PERSONAL, NON-COMMERCIAL USE ONLY. This means that you may not sell them, alter them, or share them. They are not for use on websites (including blogs), or for marketing in any way.
Should you wish to share my files with others, please post a link to my site and give due credit.

The files I offer are typically compressed, and will need to be unzipped prior to use.
Cut files are in SVG format and are compatible with Sure Cuts A Lot, and any other software cutting program that supports svg files. Digital papers are typically .png format, unless noted above.
You can contact me at cherylfirst1@yahoo.com if you have any questions about any of my files, or if you just want to drop me a note! 
Happy Crafting!  :)

July 21, 2011

For Baby....

Good morning, everyone! I can't remember if I had announced the news here, or not, but I'm going to be an Aunt! Yay! My sister is pregnant with a little girl, due in October. :0) This is her first baby, and her and I are the only siblings, so it's my first niece! Woohoo! I'm headed to MI in a couple weeks for her baby shower, and I am making her some things for the shower to decorate with.
Yesterday I finished these
(Click Image to Enlarge)
I recently purchased a DCWV Stack called Linen & Lace. It is full of pinks and browns, which I love, and thought would be perfect for these! I used the Buggy Bag SVG from SVGCuts.com Bundle of Joy SVG Collection. Mary did such a wonderful job designing these! I'm going to be working on more things in that collection, and will post them for your viewing pleasure when I have them finished! Thanks for stopping by today!

June 30, 2011

Feeling Halloween-y!

Hi, everyone!
I had an idea yesterday, and it is totally off season, but you know how it goes when you think of something and have to do it "right now"! LOL!
Here's a card I put together using the Monster Mash SVG Collection from SVGCuts. I love Halloween! I'm not sure if it's because of the season, the decorations, the colors.......or what! I know it's not because of monsters or scary movies.......I am a WIMP! LOL! My hubby loves haunted houses, and I refuse to set foot in one.......poor guy! He was probably hoping for a wife to share in his love of having the poop scared out of him.....well......not me! Nope! Not happening! LOL!
Anyhow, I can't even remember how or why I "had" to make this card "right now", but here it is.....
Like I said, I used the Monster Mash SVG's.....the house, mummy, frankenstein, dracula, bat, and tree files. I used the side step card base for this, and cut some Stampin' Up designer papers (from an old Halloween pack that the name escapes me) for the background layers. I used my MS Drippy Goo Edger Punch for the vertical green stripe paper, but it's hard to see that. I added some cobwebs, which I made from pulling a cotton ball apart. Do you think it looks too much like snow??? Jury's still out on that here........
Thanks for stopping by! Hope you like my card.....and don't think I'm too crazy for pushing to fall holidays! lol!
Happy Crafting, everyone!

November 30, 2010

A roll.....finally!

Hi, everyone! I managed to complete two more cards (same design on both) last night! Yay!
This is another Bugaboo Stamps digi, from teh Poppi Penguin Christmas collection that I recently purchased.
For the card base on this one, I welded some of the Christmas Lightbulbs from the SVGCuts.com Comet's Candy Land collection, to the Swirlies card base from the SVGCuts.com Salimah's Square Cards collection.  I then cut colored light pieces to layer on top of the welded cuts. Looking at it now, I probably could have not done the welding to the swirl, and it still would have turned out, but I do like it! :)
I used some paper glaze on the lights, Stickles on the ends. My penguin image was colored in PSE. I'm playing around with learning to color things digitally, and I am having so much fun! I used some gradients, textures, and even a pattern on this image. I added some of the paper glaze to the bulbs on tree, the star, and  on Poppi's feet and beak.
Hope you like it!
Happy Crafting!

November 29, 2010

Winter Card

Still plugging away at making cards, I decided to do some shopping over at Bugaboo Stamps! Jodie has been having a 50% off sale all month, so if you haven't already picked some up, what are you waiting for?! Her sale will be over tomorrow! :(
I picked up the great new Snowman Bundle of digi's, and I created this card with him.
I tried taking a photo of the card at an angle, to catch all the sparkle and glitter I had added with my Stickles! :)
I used SVGCuts.com Salimah's Square Cards file for the card base. I have it cut for a 5x5 overall card size.
I've been practicing coloring in images with my PSE program, which is what I did with this snowman image. I then added some Stickles on "everything"! I cut three snowflake shapes out, using the SCAL Library of Shapes, (lots of Stickles on these, too!), and used some rhinestone brads to attach them to the card. The sentiment is something I made on  PSE, and then printed and cut to fit my card. I was intending to give it away as a freebie, but I did not save it to the right resolution, and it prints a bit blurred. Sorry.....maybe the next one I do will be a freebie!
Thanks for checking out my card today! It felt good to be back in the craft room for a few uninterrupted hours! :) I'm hoping for several more this week!
Happy Crafting, everyone!

November 17, 2010

Ahhhh, yes....Progress!

I just love it when my crafting is on a roll, and I actually begin to see a small pile of "progress" on my tables!! I am trying to create, create, create this week! My son will be home for ten days, beginning this weekend, and I know I will have to be the "entertainment committee", chef, house maid, taxi, banker, etc while he is here, so I needed to get my mojo on!
I pulled out my file of SVGCuts.com svg's, as I have a TON of them, for some inspiration, and I decided to put together one of the cards from the Warm Gingerbread Cards SVG Kit that Mary put together a little while ago.  I have a HUGE sweet tooth, and after my last few cards of candy canes and gingerbreads, I figured why not continue on with the sugar overload?! hahaha!
The gingerbread house turned out beautifully, I think. I cheated a little by not cutting the gum drops out, instead I used my trusty Stickles! (What did I do before I owned these?!!). I also am not much for hearts, so I used a metal Stampin' Up Designer Brad for the decoration above the little door.
Thanks for looking! Happy Crafting!

November 13, 2010

SVGCuts.com Monthly Challenge Entry #2

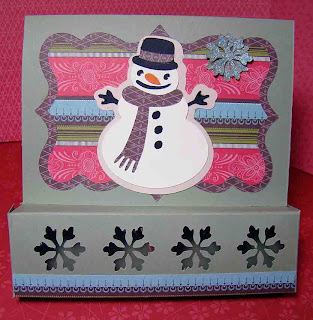
Hi, everyone! I'm still working on Christmas cards (probably will be for a while!). and this one also meets the criteria for the SVGCuts.com Monthly Challenge. Their challenge is to use elements from one, or both, of their svg collections: Santa's North Pole Workshop and Christmas Cookie Party Collection. For this card, I used elements from the Christmas Cookie Party Collection!
I cut a card base that has an attached treat box. (You can find the template and tutorial here. I will be creating an svg file for this later, but used the template and did some hand-cutting for this card).
I scored my card, per the directions, and then lined up my still-flat card stock on my cutting mat. I arranged the snowflake svg's on my virtual mat so they would show up on the front of the treat box once it was folded. I then used two of the snowflake cut-outs, applied some Stickles glitter glue (Baby Blue) and let them dry overnight. I used dbl-sided tape to adhere a piece of acetate on what is now the inside of the box part of the card.
I cut out the Snowman Cookie pieces, and layered them together. For the base paper layers, and the snowman hat and scarf, I used Stampin' Up paper called Ski Slope (retired).
I cut the scalloped label, top and bottom, for the base layers on the front of my card.
On the inside of the card, I used the Snowman Soup poem (you can find several versions of this online). I printed it out on my card stock, and to cut the scallop shape, I first cut it from a piece of blank memo paper. I line the paper up in the corners of the mat when cutting. Once the shape is cut, I layer the memo paper on top of my printed poem card stock so the print on the card stock is centered in the cut-out of the memo paper. I then line up, while carefully holding the card stock in place underneath, the memo paper back to the corner I had originally placed it on the mat. The card stock will not line up it's corners in the same place, but this will put the card stock where the scalloped label cut on the machine. (I hope this is making sense!!).
I have to pickup some candy cane sticks, and then I can finish this for my son's stocking! I will place the cocoa, a large marshmallow and the stir stick in my treat box once I have all my ingredients.
Thanks for stopping by to take a look!
Happy Crafting!

November 11, 2010

SVGCuts.com Monthly Challenge Entry

Hi, everyone!
The past two days I have been working on a Christmas card, and it meets the SVGCuts.com challenge, so I'm entering it on their forum! The challenge is to create a Christmas card using either (or both) of their SVG sets, Santa's North Pole Workshop, or Christmas Cookie Party Collection. (My card uses files from the Santa's North Pole Workshop Collection).
I created a tri-shutter card base, which you can find a tutorial for here. I chose colors and papers from my stash of Stampin' Up papers. I used Baja Breeze, Riding Hood Red and Whisper White. I used some designer paper from the Candy Lane (retired), Ski Slope (retired) and Bride Specialty papers. I cut the santa and Mrs. Clause files, and they are embellished with some 3D Paint I picked up from JoAnns. It's made by Duncan, and it is called Glittering Crystal. I applied it very sparingly, to pull more glitter than white from it. I also used Duncan Glossy Winter White 3D paint for the cake frosting that Mrs. Clause is holding. I drew the faces on each figure - I was worried that the small sizing would not cut the eyes properly from the svg file.  I chose the "Jolly" caption for the center of my card, and created the layered oval with the phrase "Have A Holiday" around the center. I used Optima ExtraBlack font for the lettering in my SCAL program.
The train and candy canes are from the SVGCuts.com files, and I embellished them with Stickles Diamond Glitter Glue. The train has some Candy Cane Stickles, as well. The tiny snowflakes are from an EK Success border puch I have. I was going to use the snowflake border on the card, but didn't like the look. so I used the scrap flakes around my card, instead! :) Each is touched with a tiny bit of Stickles on the points and in the middle.
Thanks for checking out the card. Hope you like it!
Happy Crafting!
Clicking each photo will enlarge it for better detail


September 15, 2010

A Completed Pennant Banner for Fall & Free SVG File

Finally, a chance to sit in my favorite chair this week! :)
I had a storm of activity the past three days, beginning with towing a trailer to IN (my first time towing anything). Everything went just fine, and I feel "accomplished"! lol!
I went to Kyle's school to watch his soccer game on Monday (they tied 2-2), and I had dinner with him before taking him back to campus. During the day, while he was in classes, I had a meeting with the Director of Development. I'm making a TON of paper decorations for their Spirit Week (more on those later) and for the Founders Day Dinner. The first project I have finished is the Pennant Banner that I showed you in the Sneak Peek Post. I am SO happy with the way this turned out!
This is the banner, shown full open. It is stretched across 6' in this picture, and it is meant to be draped in front of the reception table at the dinner. 
Below are some additional photos, shown close up for detail.
(Clicking on the photos will open them up in a new window, larger for a better detail image)


All of the flowers are from the 3D Mums and Fall Flowers SVG Kit from SVGCuts.com. The Scarecrow, Farmer and Crow are from the Autumn Cuddly Friends SVG Collection, also from SVGCuts.com.
On the Sunflower, I used a black gel pen, let it dry, and then a white gel pen, for the seeds in the middle. 
I used several of my Cuttlebug Embossing Folders on this project, including the Textile, Swiss Dots, Argyle. I'd love to give you the list of all the papers, but many of them are papers I have had for years, and don't know where they came from. The pennants are all Stampin Up Earth Element colors.
For the scalloped pennant shape, I created the file with SCAL Each pennant can be cut on an 8.5 x 11 piece of paper. I also made the letters into SVG's, and you can have the pennants and letters as a FREE download, so you can decorate it and make it your own style. :)

These SVG files are no longer available for free.
Please visit my SVG's for Sale Page located at the top of this blog.


AndPLEASE....


Any files I offer are for PERSONAL, NON-COMMERCIAL USE ONLY.  This means that you may not sell them, alter them, or share them. They are not for use on websites (including blogs), or for marketing in any way. 
Should you wish to share any of these with others, please post a link to my site and give due credit.
Links are available for one week only, so grab them while you can!
The files I offer are typically compressed, and will need to be un-zipped prior to use. Cut files are in SVG format, compatible with Sure Cuts A Lot, Make The Cut, and any software cutting program that supports svg files.
You can contact me at cherylfirst1@yahoo.com if you have any questions about any of my files, or if you just want to drop me a note! :)
Happy Crafting!

September 11, 2010

Scrap Hoarder Challenge/Bugaboo Challenge

Okay, so I'm way late on the ball for the Bugaboo "Dog Days of Summer" Challenge, and I messed up the challenge rule to use neutrals and only one other color (can you say EPIC FAILURE?!! Oops! I hate when that happens!) but I combined it today with a challenge that Bee posted over on SVGCuts.com forum.
First, Bugaboo's challenge was to create a card that represents the Dog Days of Summer to you. Well, to me, the end of summer means the end of having to mow the grass so darned much! :) Plus, the kids are back at school, so it becomes peaceful in the neighborhood. (I love not hearing the 4x4's up and down our road all day!!!)
Second, Bee posted that she is a hoarder of supplies. Well.........I can definitely relate to that!! Her challenge, to any and all willing to accept, is to use those supplies that you purchased "oh so long ago" for that "special" project that has never come to create a card. So, I did just that!
I had some Stampin Up paper in my stash called Rainbow Sherbet. I have been on a kick with the bright, bold colors (especially the bright greens!), and this had that in them. so I figured it's high time to use this pack! I also had some really cool Boutique Brads that matched this paper really well, and some of the Bold Bright SU brads, too. Here's my card!
This is also the first time I've ever made a tri-shutter card! What fun! I decided that they are a very time-consuming card to make, and require almost as much time as a scrap page, though, so I'm not sure I'll be creating too many of this kind, even though I think it's a cool card style!
I hand cut the martini glasses and umbrella from some scrap paper. I used my EK Success Punches for the front label, and I made the "olives" by coloring on a SU Old Olive brad with a red gel pen to make a pimento. :)  (That's my favorite part of this card!). I also added some Crystal Stickles to the glasses to make "bubbly". (I know martinis aren't bubbly, but it looks cool, right?! lol!) ;)
Anyhow, here are some close ups for you. Notice the shades? I colored them with a marker and then used a gel pen to add "glare". :)
Thanks for checking it out!


August 20, 2010

"Boo" Halloween Step Card - Freebie SVG

I've been working on making some great step cards this week, and today I finished up this one.


BOO Step Card
When the card is closed, it measures 5"x5". 
I used a MS drippy edge border punch at the top, a Sizzlit die for the scroll work along the stairs, and SVGCuts.com spider from Hazel's Wicked Witch Crafts SVG Collection. I used a lot of Stickles on this card: Purple, Eucalyptus, Icicle and Xmas Red.
For this card, I wanted the elements that make the stairs to be more decorative than just the card stock, so I am including what I cut to cover the base in the svg. 
I used a Peachy Keen stamp for the face on the step ghost, and my digi stamp is from some free clip art I found online.
This file is no longer available as a freebie!
If you wish to purchase the file, cost is $1.50. I accept Paypal payments only for my files. Payment can be sent to my yahoo email address. Please make sure to include the email address you want me to send the file to in your payment, as well as a note indicating which of my files you are purchasing.
Thank you!
email: cherylfirst1@yahoo.com

July 16, 2010

Strawberries....Mmmmmmm!

My favorite fruit in the whole world is strawberries! YUMMMMYYY! I could eat them until I explode! So, when I found this fantastic little digi stamp (for free!) at Sliekje's Digi Stamps Blog, I was so happy! It is a good image for use with my new SVGCuts.com Strawberry Lane Digicart cuts!
I colored the girl with my Prismacolor pencils. It was great to relax in my craft room and do some coloring! :)
Thanks for checking out my card - please leave me a comment to let me know what you think!
Material List

SU Cardstock - Garden Green, Certainly Celery, Whisper White
MME Magnolia Designer Paper
Prismacolor Pencils
SU Punches - Oval, Scalloped Oval
SVGCuts.com Digicart - Strawberry Lane
Cuttlebug Embossing Folders - Swiss Dots, Tapestry
Sponge Daubers
SU Ink - Kiwi Kiss, Rose Red
SU Stamp - Short & Sweet


July 5, 2010

Ah-Maize-ing!

Today, I took time to pull out some paper and print the corn pattern paper I created. I used it as the background for the fab corn svg file from SVGCuts.com Veggie Garden Part I digicart. I used "Jester" font to cut the letters out, did a lot of inking around edges, and some highlighting with a white gel pen. My Cuttlebug is the star in today's act, I think! Just lovin' the way the Tiny Mosaic and Forest Branches embossing folders added to my maize!!
Thanks for stopping by! Hope you like!
Material List


SCAL
SVGCuts Digicart - Veggie Garden Part I
Stampin Up Cardstock - Green Galore
Misc Stash Papers
My DigiPaper, printed on White
White Gel Pen
Cuttlebug Embossing Folders - Tiny Mosaic, Forest Branches
Sponge Daubers
Stampin' Up Ink - Crushed Curry, Soft Suede, Old Olive
1" Circle Punch
Ribbon Punch
American Crafts Ribbon
Jester Font

June 20, 2010

Card for mom

July is a busy month, especially in the beginning! My son's birthday is the 3rd, with my mom's and step-brother's on the the 6th. Followed with a cousin's b-day on the 11th and, of course, throw the July 4 holiday into the mix!
I am a little ahead of myself with this card completed for my mom. She's a Master Gardener, and she owns a landscaping company, so garden-themed items are always a favorite. I love this little Maid Charlotte stamp from Whiff of Joy - she's adorable! I thought she'd be a perfect image for this. :)
Material List

Whiff Of Joy Stamp - Maid Charlotte
Stampin Up CS - Soft Sky, Very Vanilla
Prima Flowers
Stampin Up brads - Soft Subtles
Stampin Up Stamp - Woodgrain BG
Stampin' Up Ink - Going Grey
EK Success Punch - Mini Flower, Long Reach Ribbon Punch
Prisma Colored Pencils
American Crafts Ribbon
Stampin Up Punch - Scalloped Circle
My Minds Eye Designer Paper
SVGCuts.com Digicart - Moonlight Garden Party

June 13, 2010

SVGCUts.com Monthly Challenge Entry

For the SVGCuts.com Monthly Challenge, Mary and Leo chose a scrapbook layout to work with, and the theme is "All About Me".
Now..............this is truly a challenge for me for many reasons: first, I have very few recent photos of myself, as I am normally the person behind the camera! Second, I do not like talking about myself - it's not my favorite subject. And last, because "All" about me can't possibly be summed up in just two photos and a small journaling area.
With that said, this is my entry. I spun it so it is more "All about me, in love". This made things a bit simpler to put on paper, and to keep it looking "cohesive". A page that entailed more "about me" would have ended up one big jumbled mess, and I would have had to pull my hair out at the result - jumbled, messy scrapping is not my style! (It's a control-thing, just nod and go "uh-huh, uh-huh....okay".)
Material List


CTMH That's Amore Designer Paper
Stampin' Up Buckaroo Blue Card Stock
Pastel Pebbles Brads
Prima Flowers
Sure Cuts A Lot
Cricut Expression
Stampin' Up Marker - Chocolate Chip
Distressed Stickles -  Aged Mahogany, Mustard Seed
SVGCuts.com DigiCarts - Breezy Meadow Butterflies,  Little Sweet Peas, Lovers Lace Freebie, Spring Flourish Square Freebie, Strawberry Lane
Cuttlebug
Embossing Folder - Swiss Dots, Butterflies
Sponge Daubers
Stampin' Up Ink - Soft Suede, Whisper White Craft Ink
Gel Pen

I made the square "Me Collage" and "in Love" title box using SCAL and some fonts (sorry - I forgot to write down the ones I used for the "me"'s). The "in Love" is a welded "Ballpark Wiener" font.  The top layer is embossed with my Cuttlebug using a folder called "Butterflies" and the "in Love" is embossed with the "Swiss Dots" folder. I then used a white gel pen to add the faux stitches, and I sponged the edges and raised images with Whisper White Craft ink to help them stand out.
I used "Label 2" bottom from the Strawberry Fields DigiCart to create the background layers, which also has some gel pen "stitching" on the top layer.  The Heart Frame is from the Little Sweet Peas DigiCart for the frame around the top right photo, This is embellished with the Stickles Mustard Seed glitter glue. The Butterfly is #9 from the Breezy Meadows DigiCart. This is sponged with the Soft Suede ink on the edges of the top layer. I used pop-dots to add dimension to the wings.
The Lovers Lave cut-outs have Stickles embellishment in them, and the simple rectangle frame around the photo on the left bottom has more white gel pen "stitching".
The Spring Flourish was layered on top of some designer paper, and I added Prima flowers, Pastel Pebbles and the butterfly to dress it up.
The journal heart is something I made in SCAL using the Basic Shapes file (circles and heart).
Thanks for checking this out! It was definitely a challenge for me, and win or lose, it was great fun to put together!

May 17, 2010

Cruise Layout

This is a page that I pulled svg's from several of my favorite blogs, plus made the porthole frames from the SCAL Shapes Library, to pull the whole page together. I welded the seasurf svg together to create the bottom water border.

Material List

CardStock - Stampin' Up Whisper White, Ballet Blue, So Saffron, Buckaroo Blue, Cool Carribean
The Paper Co. - Chromatic CardStock
Paper Studio - Shimmer Grey 
Stampin Up Punch - Word Window
Silver Brads
SVGCuts.com DigiCart - Swirlies  (SeaSurf svg)
Denise's Scrapbooking Room - Cruise Ship SVG


Prom Layout

This is crazy - I had some of this pink zebra stripe paper in my stash - leftover pieces of a 12 x 12 page froma previous project - and when I opened these photos to work on them and saw the dress....well...WOW! How cool is that?!


Material List

Stampin Up Cardstock - Groom (Specialty), Going Grey, Pink Passion
Paper Studio - Holographic Self-Adhesive 
Paper Company - Zebra Striped Pink
Pink Rhinestone Brads
SVGCuts.com My Big Day DigiCartridge  (limo)

April 29, 2010

Mom's Card

Last night I worked on a Mothers Day Card for my mom.  I was waiting fir it ti dry before posting.

Material List

Stampin Up Cardstock - Rich Razzleberry, Crushed Curry, Pretty in Pink
Stampin Up Razzleberry Lemonade
Stampin Up Ink - Rich Razzleberry, Crushed Curry
EK Success Border Punch
Craft Ribbon
Stampin Up Stamps - Organic Grace
Pop Dots
Dew Drops
SVGCuts DigiCart - Swirlies, Sunflower Frame
Sure Cuts A Lot
Cricut Expressions